
Welcome to the second installment of Get This Look with Inspired LED! This week we’ll be analyzing a simple, yet creative way to add LED lighting to the bathroom…
Whether for a high-end restaurant or a residential remodel, bathrooms are a great place to utilize LED accent lighting. Not only do lights help to set the mood in this area of the home, but when used around a mirror, they serve a particularly functional purpose. Done properly, mirror accent lighting can not only help your bathroom to look amazing, but they can help to make you feel amazing about the way you look as well!
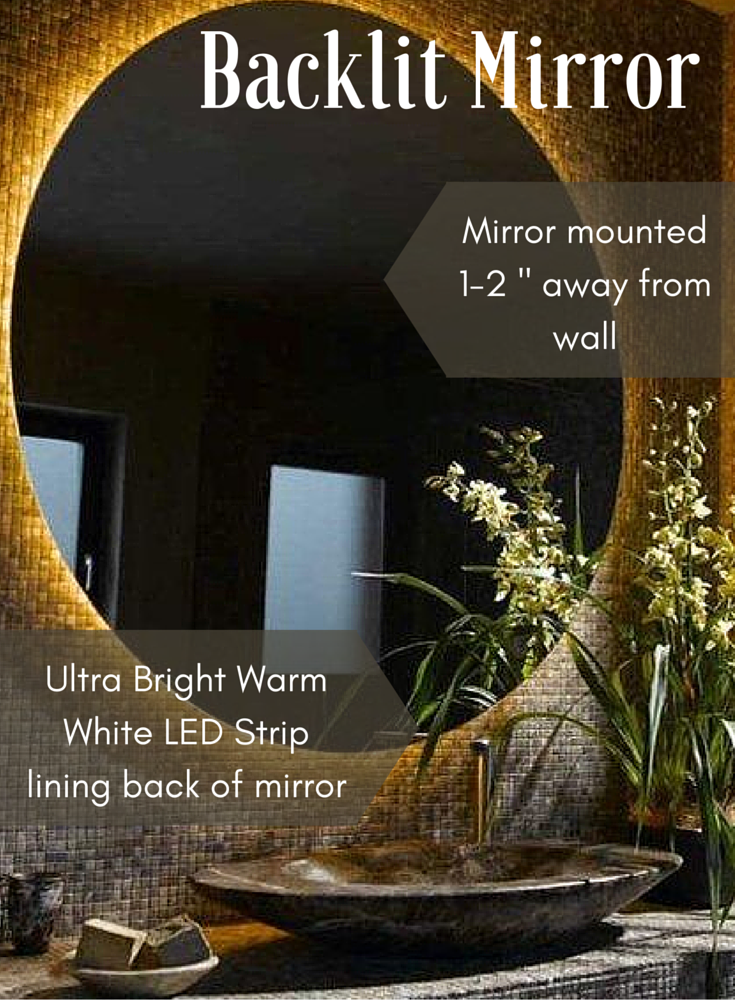 To achieve this look, you will need to start with a “floating” wall mirror- you can purchase one with its own mounting hardware, or create your own spacers for a mirror of your choosing. The goal is to give yourself a couple of inches between the back of the mirror and the start of the wall.
Before mounting your mirror, turn it upside down and measure out a pattern on the back, at least two inches from the edge (to prevent the tape from being seen too easily). Depending on the shape of your mirror, the perimeter or circumference of this shape will determine the amount of flexible LED tape you will need in order to create the glowing effect. To get a nice even glow without any dots, or “hot spots”, our design team recommends using Ultra Bright LED strips, which are available in a variety of colors to match your bathroom decor.
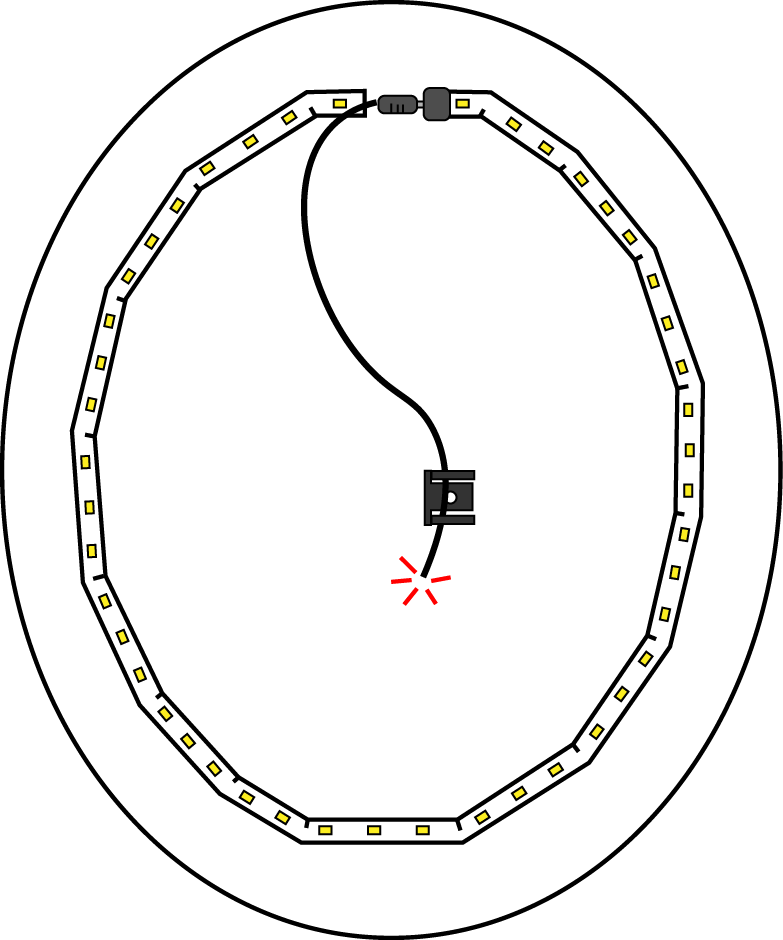
Use your LED strip and some scotch or painters tape to temporarily line the back border of your mirror, using the approved “How to… bend flex” method as needed to get around edges or curves. This will allow you to ensure the layout of the LEDs is to your satisfaction before removing the adhesive backing and securing the LED flex in place.
Once the LEDs have been adhered, they can be connected to power
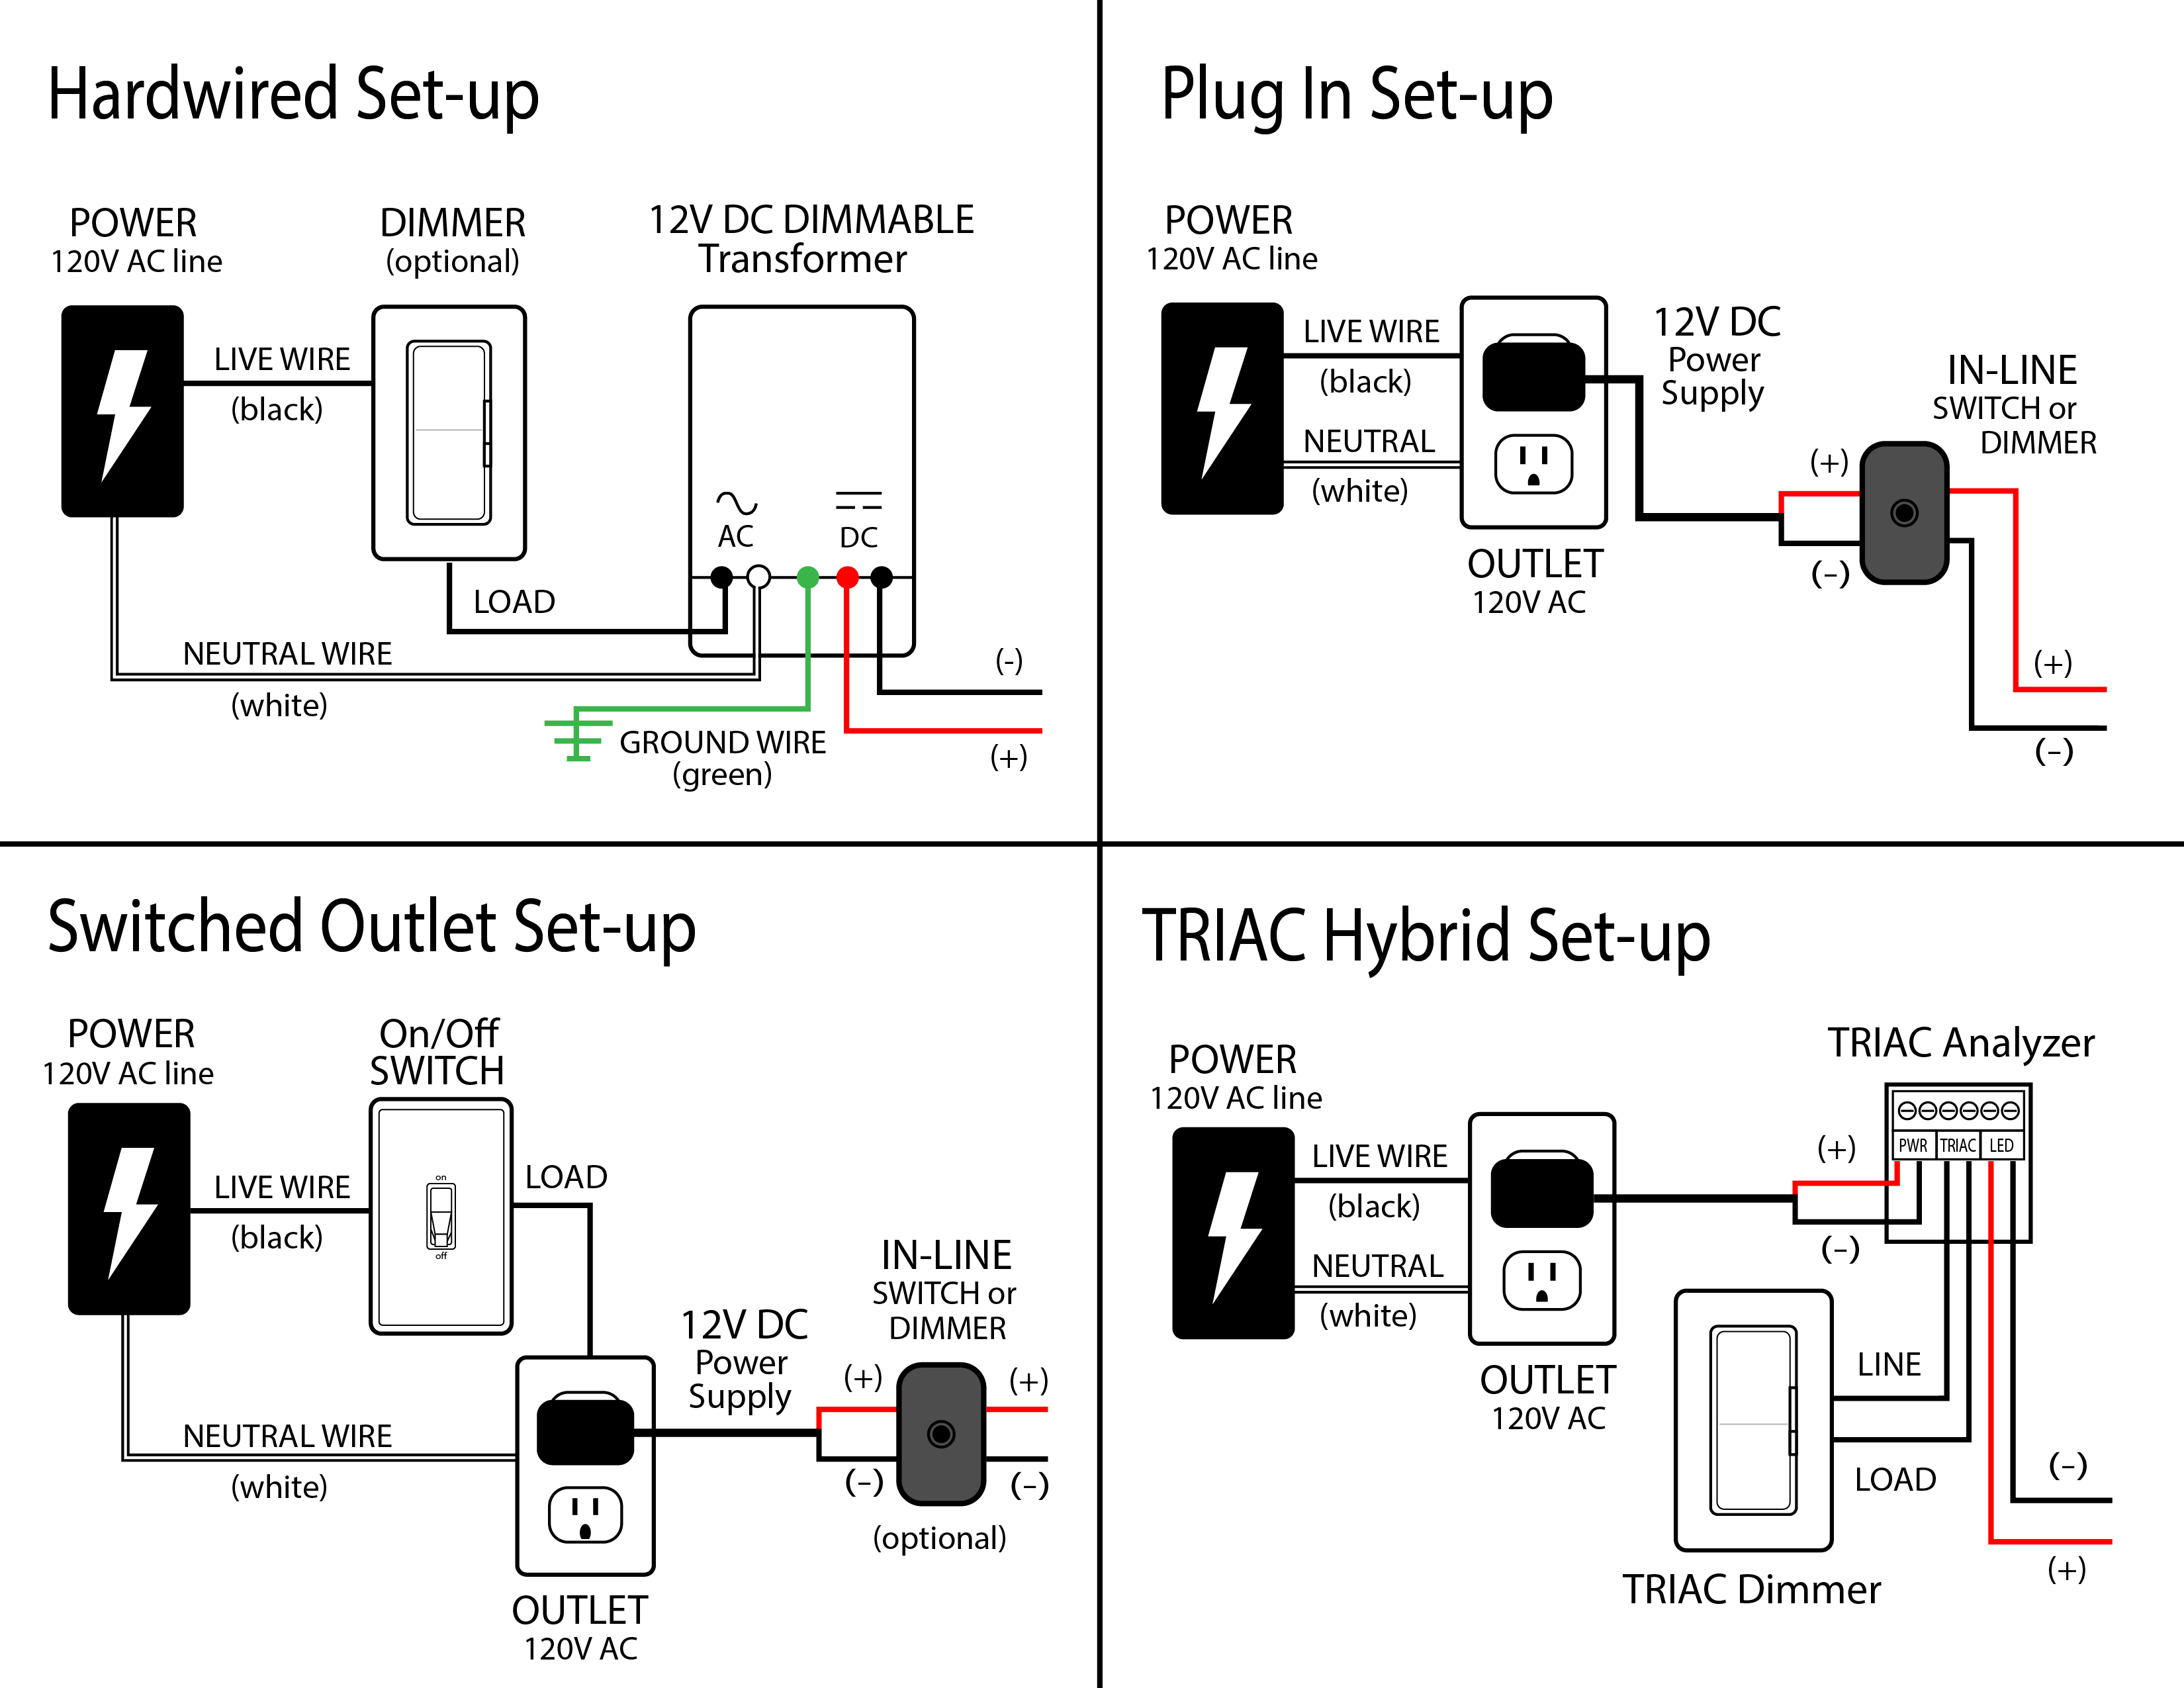
in one of two ways. If you intend to hardwire your LED system in order to control it from a wall switch, your electrician will need to drill a hole in the wall behind your mirror in order to run cable back to a dimmable transformer.
Alternatively, you can have a standard wall outlet installed behind the mirror paired with a plug-in power supply.To provide basic on/off control from a wall switch, this can be made into a switched outlet, or for dimmable control, a TRIAC analyzer can be incorporated into the system. You can use the chart below to determine which wiring method is right for you:
Once everything has been connected and tested for functionality, your last step will be to adhere cable clamps in order to keep any excess wire tucked behind the mirror out of sight. And that’s that! A simple, cost effective way to use LEDs to create this glamorous effect in your own bathroom.
Be sure to keep an eye on our blog for the next feature of Get This Look with Inspired LED, as well as other project tutorials, and company news. For assistance with your next lighting project, contact our customer service team at orders@inspiredled.com, or take advantage of our free Design Services for a free layout and quote!


