In our previous blog post, “Where to Start? Retrofitting Your Existing Lights to LED’s- Part 1” we uncovered the tough questions in deciding the control, brightness, and color temperature options for LED under cabinet lighting. Now let’s dive into the easy part, the installation phase! Of course in new construction and full renovations, you will have more open-ended options than what follows. However in a retrofit application, we will outline specific scenarios that can dictate your options of how you power and control our product line based on the existing wiring or system.
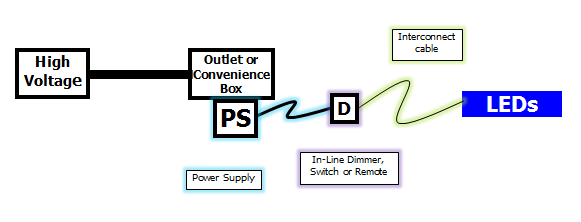
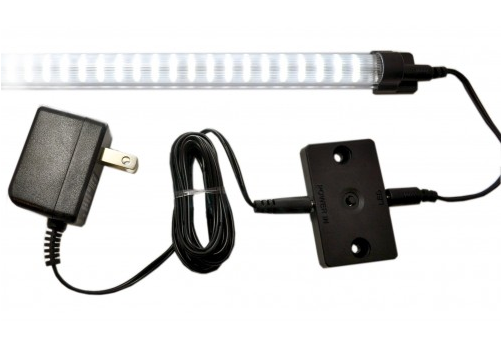
In hardwired and plug-in low voltage LED lighting systems, the key difference in the “flow of the system” is the location of the dimmer. Systems using plug-in power supplies will utilize an in-line dimmer to adjust the LED brightness. This is placed on the low voltage side between the Power Supplies 12 Volt output and the LEDs. Systems using a hardwire option will utilize a wall dimmer switch located on the high voltage side.
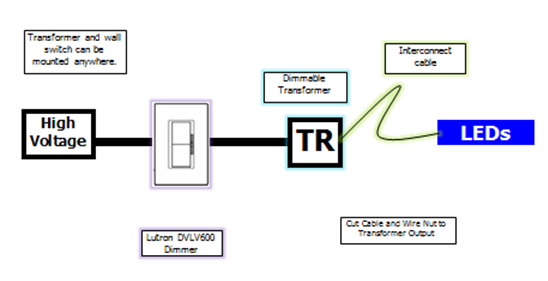
Hardwired Chain of Components:
Plug-In Chain of Components:
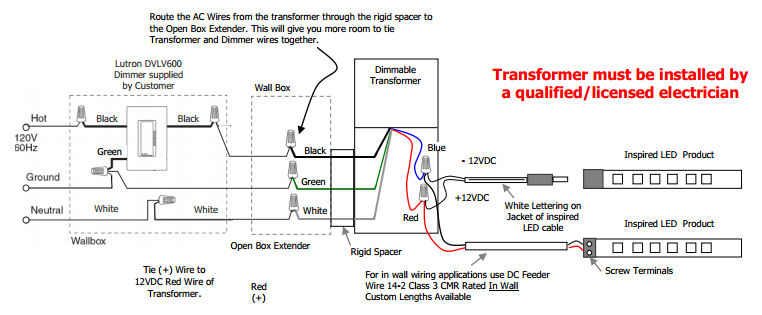
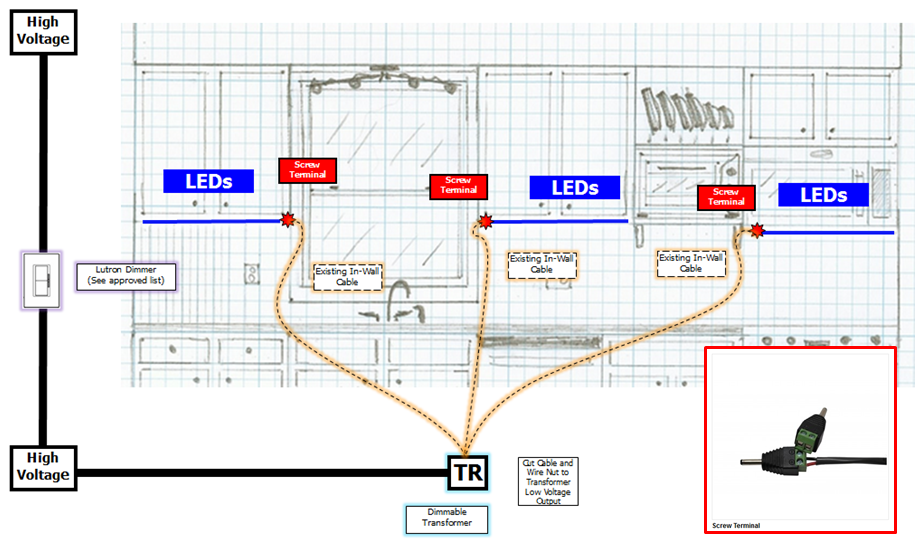
A simplified installation approach is to install the Dimmable Transformer on the junction where all the existing wiring starts, between the low voltage magnetic wall dimmer and the LEDs. Usually this junction is in in the attic or basement, but sometimes it is not accessible at all. In this case we move to Option 2 and use multiple transformers. Please be aware that transformers must be installed by a qualified/licensed electrician.
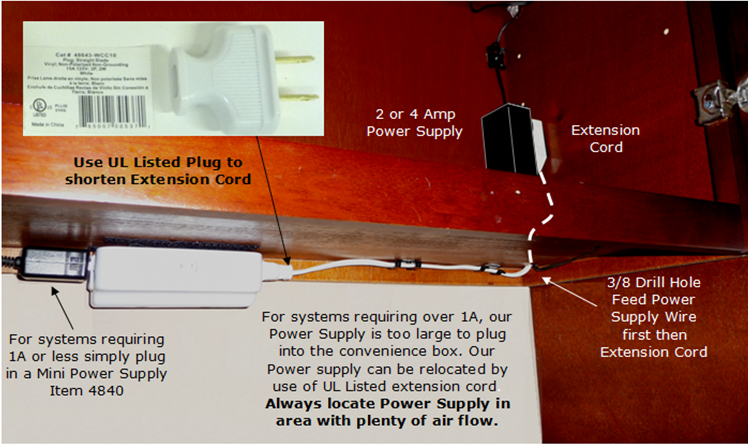
If dimming the under cabinet LEDs from the wall switch is not necessary, a Plug-In system can be easier and more cost effective. Please proceed to Option 3.
Option 1: Hardwire Single Transformer
Install a single Dimmable Transformer at the junction where all the existing wiring meets, turning it into low voltage lines that will connect to the LEDs with a Screw Terminal.
*Screw Terminals will accept 16AWG or smaller
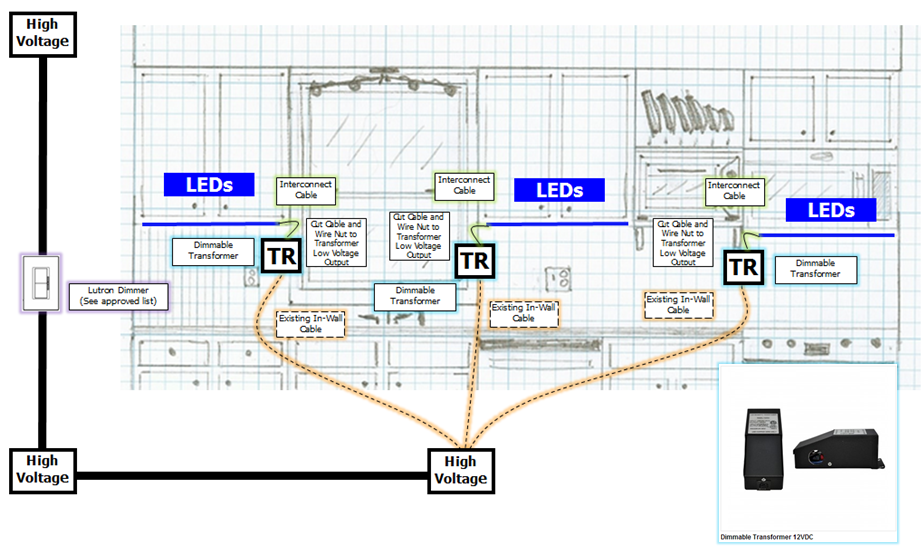
Option 2: Hardwire Multiple Transformer
When the junction to the existing wiring is not accessible, install a Dimmable Transformer at each of the existing cable drops. Interconnect cables are spliced onto the low voltage output of the transformer to connect the LEDs.
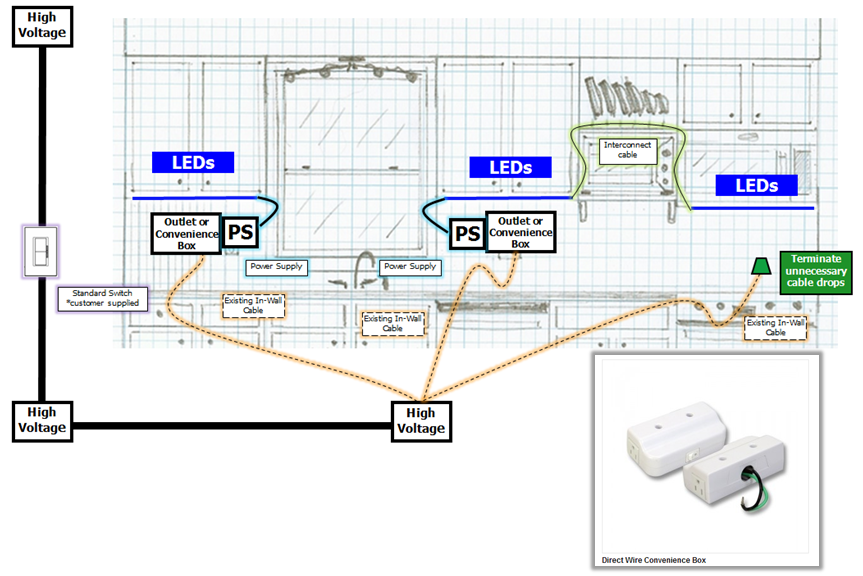
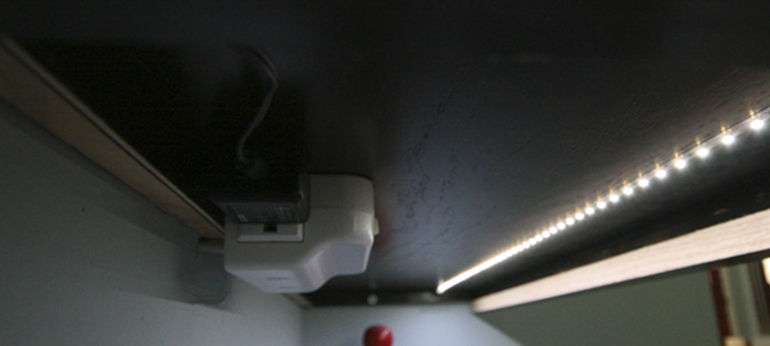
Option 3: Plug In System w/ Convenience Boxes
Alternatively you can create a Plug-In system by feeding the existing high voltage cable drops into a Direct Wire Convenience Box that hides under or inside the cabinet (pictured below). You can also convert these to standard AC outlets. The on/off function can still be the standard switch; the optional dimming function requires an in-line dimmer on the low voltage side.
*Plug-In Power Supplies do not respond to dimming from the wall switch or outlet/Convenience Box.
We hope this two part blog brings light to the often over-complicated options our customers face when choosing the right LED lighting components to install. As always with any project large or small, Inspired LED has knowledgeable lighting professionals available and ready to assist you! You may contact them at design@inspiredled.com.
Please subscribe to our Newsletter and feel free contact us for any help in designing your LED Lighting System!