
Inspired LED’s Plug & Play Pro Series and Designer Series kits are the perfect solution for anyone looking to give their kitchen a quick, yet dramatic lighting upgrade. Available on the Inspired LED website and through our Amazon store, these handy kits come with everything you will need to create a complete low voltage LED system, including, lights, cables, power sources, and controllers.
Basic installation is fairly simple, and can be completed within an hour by following just a few basic steps. Read through our installation guide below to see how it’s done. If at any point during your LED install you have questions which are not addressed in this blog, simply contact our customer service team at 480-941-4286 and we will be happy to provide you with further assistance!
Project Time: 1 hour or less
Before you begin: LED panels are robust and long lasting if installed properly, however as with any electrical component, they should be handled with care, especially when dealing with end connectors.
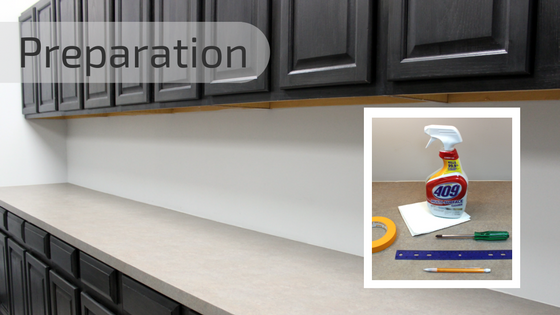
You will need: An Inspired LED Pro Series or Designer Series Kit, a damp cloth and/or cleaning spray, Scotch or painter’s tape, a ruler, a pencil, a screw driver (if desired)
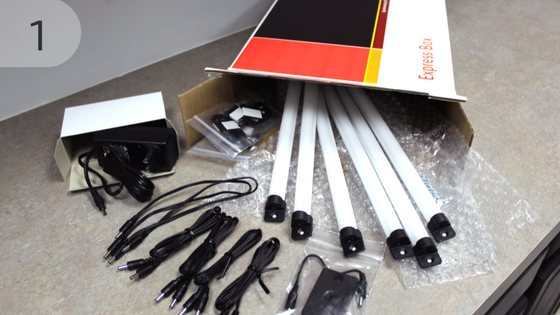
Step 1: Open your package completely to ensure that all components have been included.
While our products are surprisingly bright, our energy efficient designs mean that certain products are surprisingly small in size as well, so be sure to open and unwrap your package in its entirety. You will notice that Inspired LED kits come with everything you need to create a complete system- including light panels, mounting screws, interconnect cables, a power supply, a control switch or dimmer, and cable clamps to help hide away any excess cable.
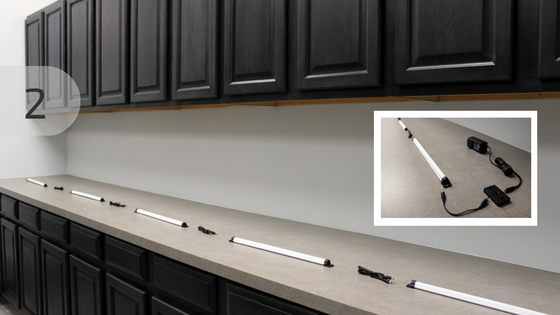
Step 2: Clean and lay out your desired system in the installation area.
If you are installing under cabinets, or shelves use a damp cloth or cleaning spray, ensuring the area is both clean and dry before proceeding. In general, when laying out your system the first component in series should be the power supply, followed by the controller (this may be an inline switch, a 4-position dimmer, or both)! From the controller, use an interconnect cable to lead to your first light panel. If you are using an off-the-shelf Super Deluxe Kit there will be a variety of lengths to select from, chose the one which best suits your needs. If you made cable swaps for specific lengths, or if you received a custom kit from our Design Team, be sure you have selected the correct cable for this location. Continue to lay out your system by placing light panels in their desired positions, and designating appropriate cables to connect one light to the next. Place your cable clamps off to the side, you will not need them until step 5 (but be sure not to lose them)!
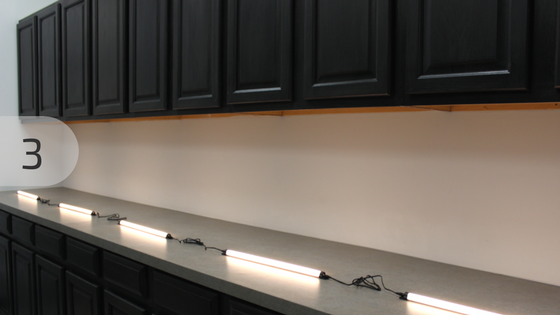
Step 3: Test your system for functionality.
All of our products are quality tested in-house to meet the highest standards, however from time to time, unexpected damage may occur during the shipping process. So before moving onto the next step, we recommend testing your items to avoid any complications. Begin by plugging in your power supply and connecting it to your control switch or dimmer. Then continue connecting your system with cables, “daisy chaining” from one light to the next until all components are wired together. Test your system by flipping the switch or cycling through the dimmer a few times (note: if you are using both a switch and a dimmer in one system, the switch will need to be in the “on” position in order for the dimmer to function). Check to be sure that all light panels are fully operational. If you notice a certain light, or set of lights are not turning on, move on to the “How to Troubleshoot” Blog. Once you have everything working to your satisfaction, you can begin step four.
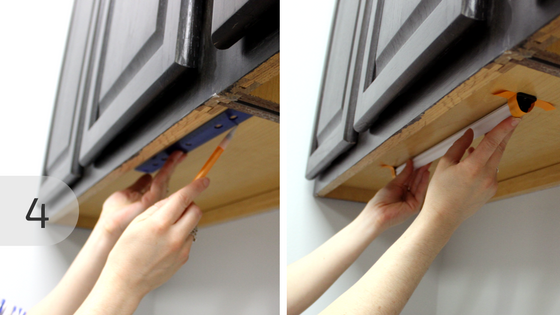
Step 4: Position your light panels.
We recommend that before removing adhesive backing or mounting light panels in place with screws, you temporarily mount your system using scotch or painters tape. This step takes only a few minutes, but it is a highly valuable technique which allows you to see and adjust the lighting effect before permanent installation. Begin by using your ruler and a pencil to draw guide lines along the underside of each cabinet. Typically we recommend positioning light panels about 1-2 inches from the front of a cabinet or shelf for best light output, or if you have highly reflective countertops you can reduce glare by mounting directly on the cabinet lip facing the backsplash.
Use your guide lines to position the LED panels in the desired location. Once the lights are all taped in place, plug your power supply into the switch or dimmer, and use scotch or painters tape to mount the controller in the desired location. Use your cables to connect one light panel to the next until your system is complete, using tape as needed to hold cables out of the way temporarily. Turn the LEDs on using your switch or dimmer, then take a few steps back to get a complete view of the lights and shadows. Adjust the positioning of light panels and cables until you are happy with the overall effect.
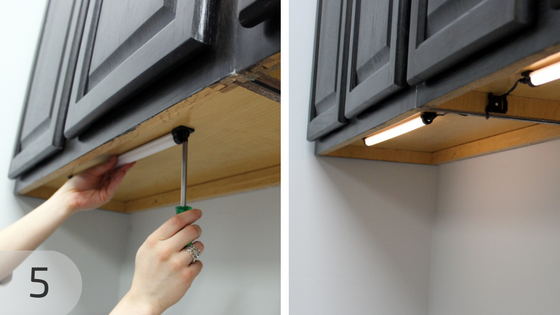
Step 5: Mount your lighting system in place.
Inspired LED components are designed to be mounted to almost any flat surface using either adhesive backing or screws (both included). Begin by installing your light panels in their pre-determined positions. Plug in your power supply and cables to reconnect the system. Use adhesive backing or screws to mount the switch or dimmer in a convenient location. Bundle up any excess wire and use cable clamps to tuck it up out of the way. These clamps can be mounted using adhesive backing or screws.
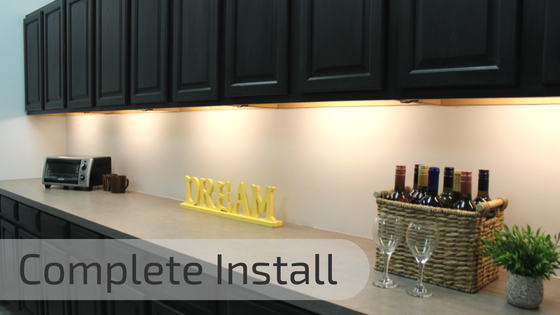
Once everything has been connected and installed, switch on your new lighting system, then sit back and enjoy!
We always love to see the results of our customer’s work, so feel free to send us a photograph of your completed project! If at any time during the installation process you experience difficulty with your LED system, be sure to watch our video tutorial here, or read through our comprehensive troubleshooting guide, or contact us directly for help. Our award-winning customer service team is eager to help!