Wood Workbench- In-line Switch

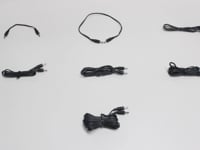
This workbench job is a system that uses a plug in power supply, in-line switch, interconnect cables and custom flex strips.
Measure available space for flex:
To build this lighting set up you will first need to measure the length of the area of where the flex strips will be mounted. Once you have the full measurement, you will need to subtract 3” in order to make room for the cable connectors on each side. This job had two measurements made on either side of the center workbench post.
Mounting the flex strips:
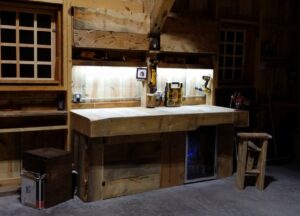
Before mounting the flex strips you will want to clean the area, where you plan on placing the flex, with isopropyl alcohol to remove any dust or dirt. For this job the customer wanted to create as much task light as possible. The best way to achieve this is to mount the flex strips facing straight down onto the work area. It is also a good idea to try and mount the strips further away from the back wall so that the lights are centered a little more over the work area rather than mostly on the back part of the bench.
Providing Power:
After knowing where the flex strips will be placed, it is a good idea to know where the power supply will be mounted so that you’ll know how to run the cables. In this job, the power supply is plugged into an outlet on the back left side of the wall. Since this outlet is not a switched outlet, the lights would stay on at all times. However, the customer used an in-line switch in the system to be able to turn the lights on and off.
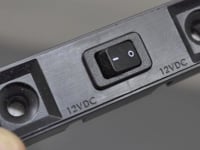
Mounting the In-Line Switch:
When mounting the in-line switch you will want to place it in the very beginning of your flex strip run in order to control all the lights. In this case, since the power supply is plugged into the outlet on the left side of the workbench, the switch was also mounted on the left side of the workbench. The switch was mounted about half way up the side wall so that it was easily accessible to turn the lights on and off. The cable inputs on the switch are interchangeable so the power supply can plug into either option. Once the power supply cable has been plugged into one input, the interconnect cable will plug into the second input and run up to the first flex strip in the series.
Wiring Cables:
The first cable on this job that came out of the switch and runs to the first light is a little more revealing than most cables. It was ran up the side wall and then plugged into the first light of the series. Inspired LED’s cable clamps were used to hold the cable up in place and keep it from dangling down. The second cable jumped around the center post on the workbench. This cable was able to be hidden behind the small trim of the workbench that the lights hide behind as well.
Instruction Sheets
Check out our video tutorials below!
Videos
 How to Cut, Connect, and Power LED Flexible Tape
 Plug-In Power Supplies
 In-Line ON/OFF Toggle Switch | Inspired LED
 Interconnect Cables | Inspired LED
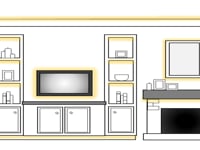 Where to Place LED Strips and LED Systems in your Home