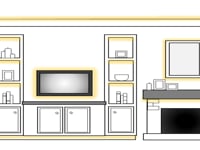
Museum Display Case- Hardwired System


This museum display setup is a hardwired system using a 60w E-Series Transformers, Lutron Wall Dimmers, several Interconnect Cables, and our Mega Bright Flexible Strips. Each Transformer has been placed underneath the corresponding display case, both connected back to the same Lutron Wall Dimmer for single zone control.
Measure available space for flex:
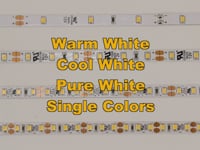
Start by measuring out the entire length of the available area where the flex strips will be mounted. Once you have the full measurement, you will need to subtract 3” in order to make room for the cable connectors one each side. Before measuring the shelves, it is a good idea to know where you are planning on mounting the LEDs. For this application, the customer wanted to accomplish a higher output display case lighting, in order to take advantage of the full dimming features of the LEDs. We used Mega Bright Flexible Strips which features 36 LEDs per foot, making it the brightest 12v option we offer.
In this application, the customer measured the vertical length of the trim on each side of the four display cabinets to keep the flex strips hidden.
Mounting the flex strips:
Mount the flexible strip on the available front trim of the displays with the LEDs facing towards the back of the unit. Mounting the flex this way will illuminate the area and help eliminate any spotting. Using the available trim in this way also serves as a great way to hide the flex strips. In this instance with the Mega Bright LEDs, the higher light output allows us to use less cabinet space while maintaining a full, uniform light.
Once you have decided on where you want to mount the LEDs, you will want to clean the areas where the flex will be installed. Use isopropyl alcohol or a cleaning solution to remove any dust or dirt that may be on the shelves.
Wiring cables:
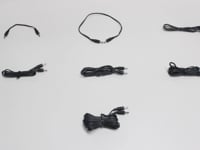
In this setup, the customer chose to tie Interconnect Cables from each Transformer, to utilize the male and female plug and play connectors. Being a hardwired system, the transformers use bare wire outputs to supply power to the LEDs. Start by cutting one of the male ends off of the designated Interconnect Cable, leaving you with two bare wires. On Inspired LED’s cables, the two wires or conductors represent the positive and negative connection. The housing with the small white lettering indicates the positive, and the bare black housing being the negative.
Once the cable has been stripped bare, you will need to wire-nut the outputs directly to the corresponding wires on the transformer. In this application, each individual Mega Bright Strip has a dedicated wire from the transformer.
Providing Power:
In a dimmable hardwired system, we use a dimmable transformer instead of a plug-in power supply. The transformer splices directly into the high voltage wiring coming from the wall switch or dimmer, instead of an outlet. Plug-in power supplies are not compatible with any high voltage wall dimmer/switches and can cause the power supplies to fry. Make sure you check out the instruction sheet labeled ‘How to wire a transformer’ and make sure you have a licensed contractor or electrician to install the transformer.
Once the transformers have been connected to the high voltage wiring from the wall dimmer, test out the system and its full dimming function to ensure the system is operating correctly.
Instruction Sheets
Check out our tutorial videos below!
Videos
 How to Cut, Connect, and Power LED Flexible Tape
 Magnitude Electronic Transformer Inspired LED
 Interconnect Cables | Inspired LED
 Where to Place LED Strips and LED Systems in your Home