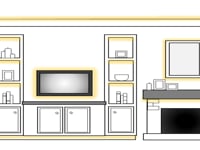
Display Case – Multi-Zone Remote Dimmer
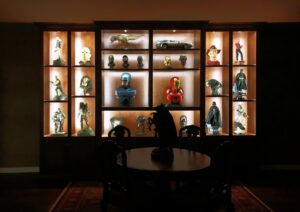

This kitchen lighting setup is a plug and play system using plug-in power supplies, custom flexible Strips, a Multi-zone Receiver and Remote system, Tiger Paw connectors, and bulk cabling. The power supplies are plugged into outlets behind the shelving units, and then controlled as 3 individual zones through the handheld remote.
Measure available space for flex:
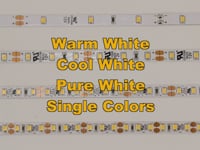
Start by measuring out the entire length of the available area where the flex strips will be mounted. Once you have the full measurement, you will need to subtract 3” in order to make room for the cable connectors on each side. Before measuring the shelves, it is a good idea to know where you are planning on mounting the LEDs. For this application, the customer wanted to accomplish an accenting lighting feature for their custom display cabinet. We used Super Bright Flexible Strips, which features 18 LEDs per foot.
In this case, the customer measured the available vertical space of the four tall displays on each end and the width and height of the wider, middle displays.
Mounting the flex strips:
Mount the flexible strip on the available front trim of the shelf with the LEDs facing towards the back of the unit. Mounting the flex this way will illuminate the area and help eliminate any spotting. Using the available trim in this way also serves as a great way to hide the flex strips. For the middle displays, the customer chose to run LEDs along the top trim of each display, to ensure uniform lighting across the longer width.
Once you have decided on where you want to mount the LEDs, you will want to clean the areas where the flex will be installed. Use isopropyl alcohol or a cleaning solution to remove any dust or dirt that may be on the shelves.
Wiring cables:
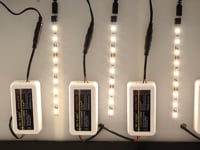
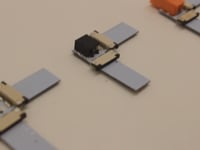
In this setup, the customer chose to daisy chain the LED Strips together with bulk cabling and Tiger Paw Connectors. Tiger Paws will allow you to terminate bare wiring in and out for DIY installation on site. This allows the customer to route wiring from the RF Receivers to each LED run as needed without being limited to standard cable lengths.
In the middle displays, the customer has used Right Angle Tiger Paws with Screw Terminal inputs to chain the vertical runs together, as well as continue the run around each individual cupboard along the 90 degree turns.
Provide Power:
After running the bulk cable, you will want to plug the power supplies into their respective RF Receivers make sure the lights are all working properly. As mentioned before, the power supplies and their receivers are controlled as individual zones through the Multi-zone Remote Dimmer. This Dimmer allows the customer to control each Receiver separately from one another through the zone controls, labeled 1 through 4. Use of this Remote also allows you to control each Receiver at once through the master on and off buttons.
Instruction Sheets
Check out our tutorial videos below!
Videos
 How to Cut, Connect, and Power LED Flexible Tape
 Plug-In Power Supplies
 Multi-Zone Dimmer w-Wireless Remote for LED Lighting Systems Inspired LED
 Right Angle Tiger Paw LED Strip Connectors Inspired LED
 Where to Place LED Strips and LED Systems in your Home